Rapid BI Catalog allows you to generate documentation or export metadata from Tableau and Power BI content through both a web interface and a command-line interface (CLI). Choose the method that fits your workflow and environment.
Using the UI
Step 1: Choose a Workbook Source
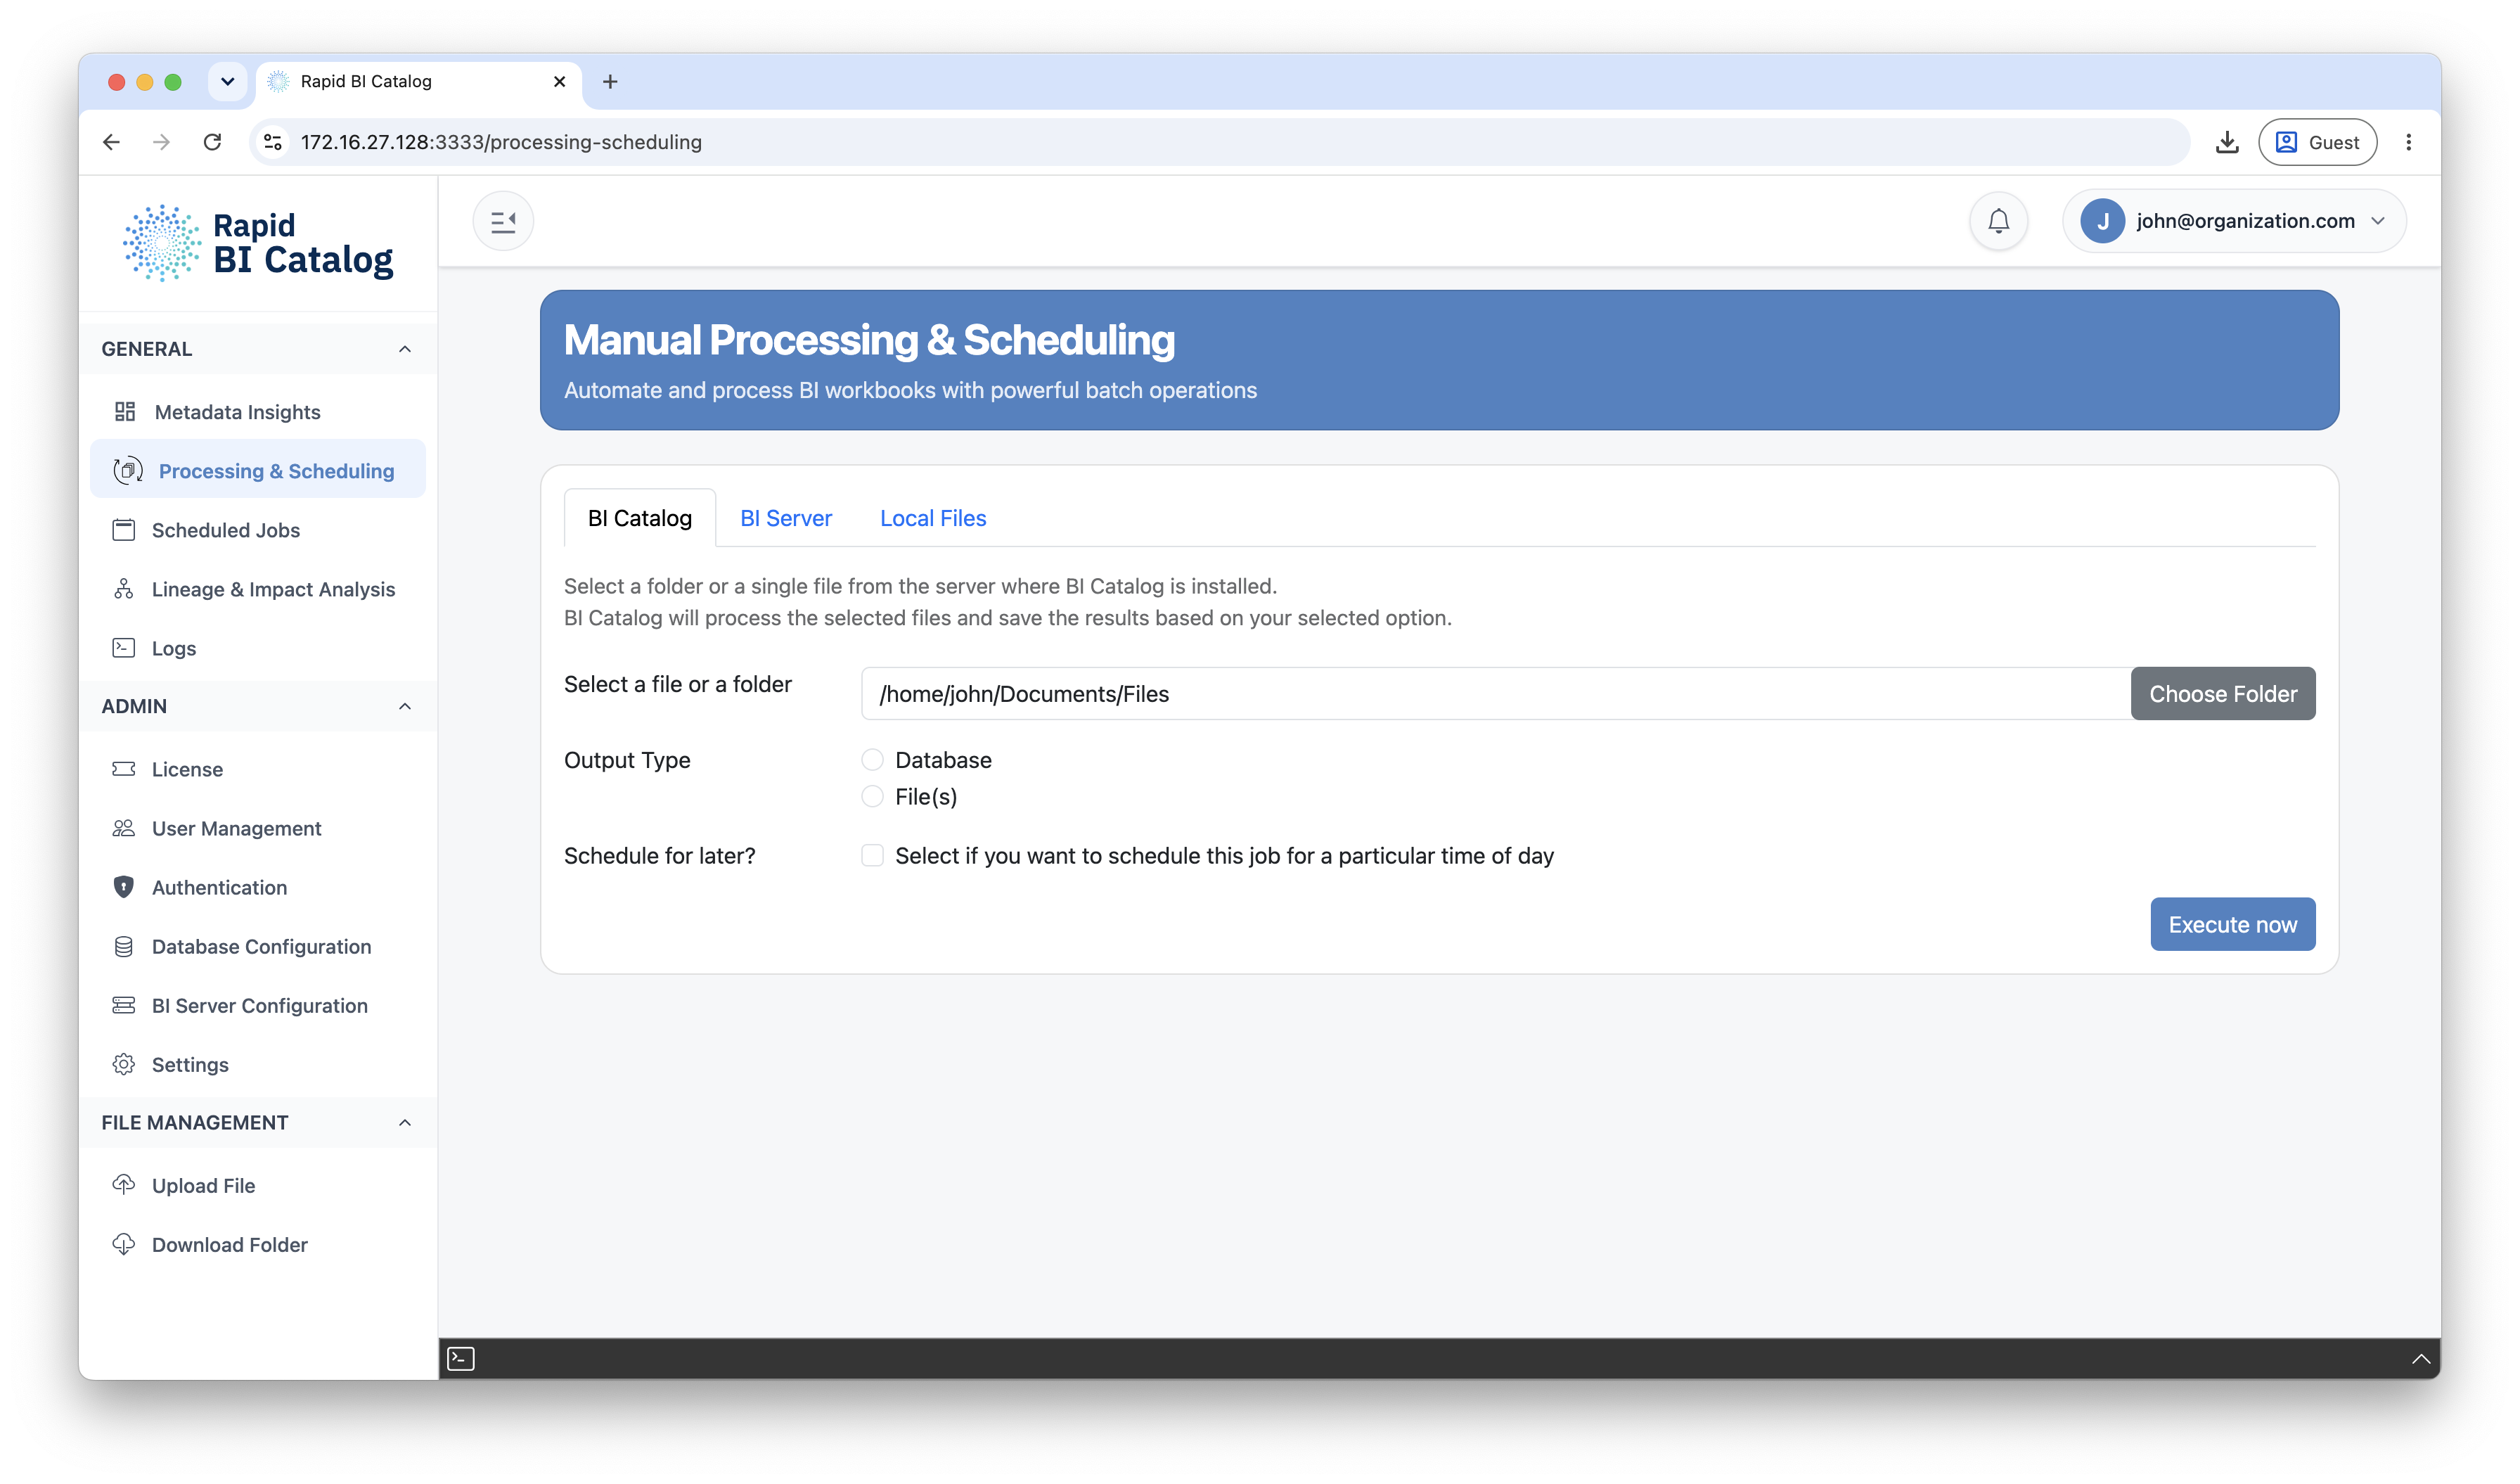
a. Rapid BI Catalog (Server Files)
Process workbooks stored on the server where Rapid BI Catalog is installed.
- Select the Rapid BI Catalog tab.
- Click Select a file or a folder.
- Choose your output type (File or Database).
- Optionally enable Schedule for later.
- Click Execute now.
b. BI Server (Tableau and Power BI)
The BI Server tab hosts both platforms. Which are offered depends on your licence: the tab is hidden only if neither is licensed.
Tableau Server or Tableau Cloud:
- Select the BI Server tab, then Tableau.
- Choose an Environment, Site, and one or more Projects.
- Choose workbook selection:
- All Workbooks — process every file in the selected projects
- Select Workbook(s) — choose specific files
- Choose output type, then run or schedule.
Power BI:
- Select the BI Server tab, then Power BI.
- Choose a Workspace. This is a single selection.
- Choose one or more Reports. This is a multi-select, with a select-all option.
- Choose output type, then run or schedule.
c. Local Files (Upload)
Upload files from your local machine for ad-hoc processing.
- Select the Local Files tab.
- Click Choose Files to upload
.twb,.twbx,.pbixor.pbitfiles. - Choose output type.
- Click Execute now.
Step 2: Choose Output Type
File(s)
Generates documentation files in one or more formats:
| Format | Best for |
|---|---|
| HTML | Web-friendly, browseable output |
| Printable, shareable documentation | |
| DOCX | Editable Word documents |
| Excel | Tabular review and comparison |
| CSV | Machine-readable metadata per section |
Database(s)
Exports metadata to a configured database for querying, governance dashboards, or analytics:
- MySQL
- MS SQL Server
- PostgreSQL
Keep Latest Option
When reprocessing workbooks that have already been processed before, you can control how existing records are handled with the Keep Latest toggle:
| Keep Latest | Behaviour |
|---|---|
| On (selected) | Previous output records for the file are deleted, and only the new records are retained. Keeps the dataset clean and current. |
| Off (not selected) | Previous records are marked as outdated (latest = 0 on MySQL/MS SQL, latest = false on PostgreSQL) while the new records are written with latest = 1 / latest = true respectively. Allows historical comparison. |
Real-Time Logs
A logs terminal at the bottom of the page automatically expands when processing starts. It shows real-time progress including which workbooks are being processed, extraction stages, and any errors.
Step 3: Schedule for Later (Optional)
Enable the Schedule for later toggle and configure:
| Field | Description |
|---|---|
| Job Title | A descriptive name for the job |
| Schedule Timing | Date and time for the first run |
| Schedule Frequency | How often the job repeats (see table below) |
| Option | Description |
|---|---|
| One Time | Runs once at the specified time, then stops |
| Every Day | Runs daily at the specified time |
| Every Weekday | Runs Monday through Friday at the specified time |
| Every [Day of Week] | Runs weekly on that specific day (e.g., Every Monday) |
How Scheduled Jobs Authenticate
Scheduled jobs run unattended, so they cannot use your personal sign-in. Tableau Server and Tableau Cloud jobs instead authenticate with the site's Service Account — a dedicated Tableau token — so a Service Account must be configured for a site before you can schedule Tableau jobs against it. Jobs that process files already stored on the Rapid BI Catalog server do not need one.
Power BI scheduled jobs need no Service Account. The Power BI connection already authenticates as a service principal rather than as a person, so a scheduled Power BI job uses the environment's own credentials. Configuring the environment is all that is required.
Using the CLI
The bicatalog command-line interface processes files available on the server's file system — Tableau workbooks or Power BI report files you have downloaded or placed in a folder there. Process Tableau Server, Tableau Cloud and Power BI Service content from the web UI, which manages authentication for you; direct command-line processing of those sources is not available currently.
Generate Documentation
The following must be available for the CLI command:
- The source file storage directory
- The desired output format
- The destination folder for output files
Command
bicatalog start -s <sourcefolder> -f <outputformat> -o <outputfolder>| Parameter | Description |
|---|---|
-s | Path to a source file or folder. Accepted extensions: .twb, .twbx, .pbix, .pbit |
-f | Output format: pdf | html | excel | csv | docx | all |
-o | Output folder path where generated files are written |
Example
bicatalog start -s /home/source -f pdf -o /home/outputExport Metadata to Database
Command
bicatalog start -s <sourcefolder> -f db -k <keeplatest> -o <outputfolder>| Parameter | Description |
|---|---|
-s | Source file or folder |
-f | Use db for database export |
-k | true — delete previous records and keep only the latest. false — mark previous records as outdated (latest = false) and add new records with latest = true |
Example
bicatalog start -s /home/source -f db -k trueOutput Folder Naming
If two Tableau workbooks have the same name but different file extensions (e.g., Superstore.twb and Superstore.twbx), the output folder names are automatically qualified to avoid conflicts:
| Scenario | Output folder name |
|---|---|
| Single extension only | Superstore-05022025-113105 |
| Both .twb and .twbx present | Superstore-TWB-05022025-113105 and Superstore-TWBX-05022025-113105 |
Next Steps
- Set up the token scheduled jobs use: Service Accounts
- Manage recurring jobs: Scheduled Jobs
- Map your Tableau users: User Discovery
- Download generated outputs: Download & Upload Files
- View execution history: Logs