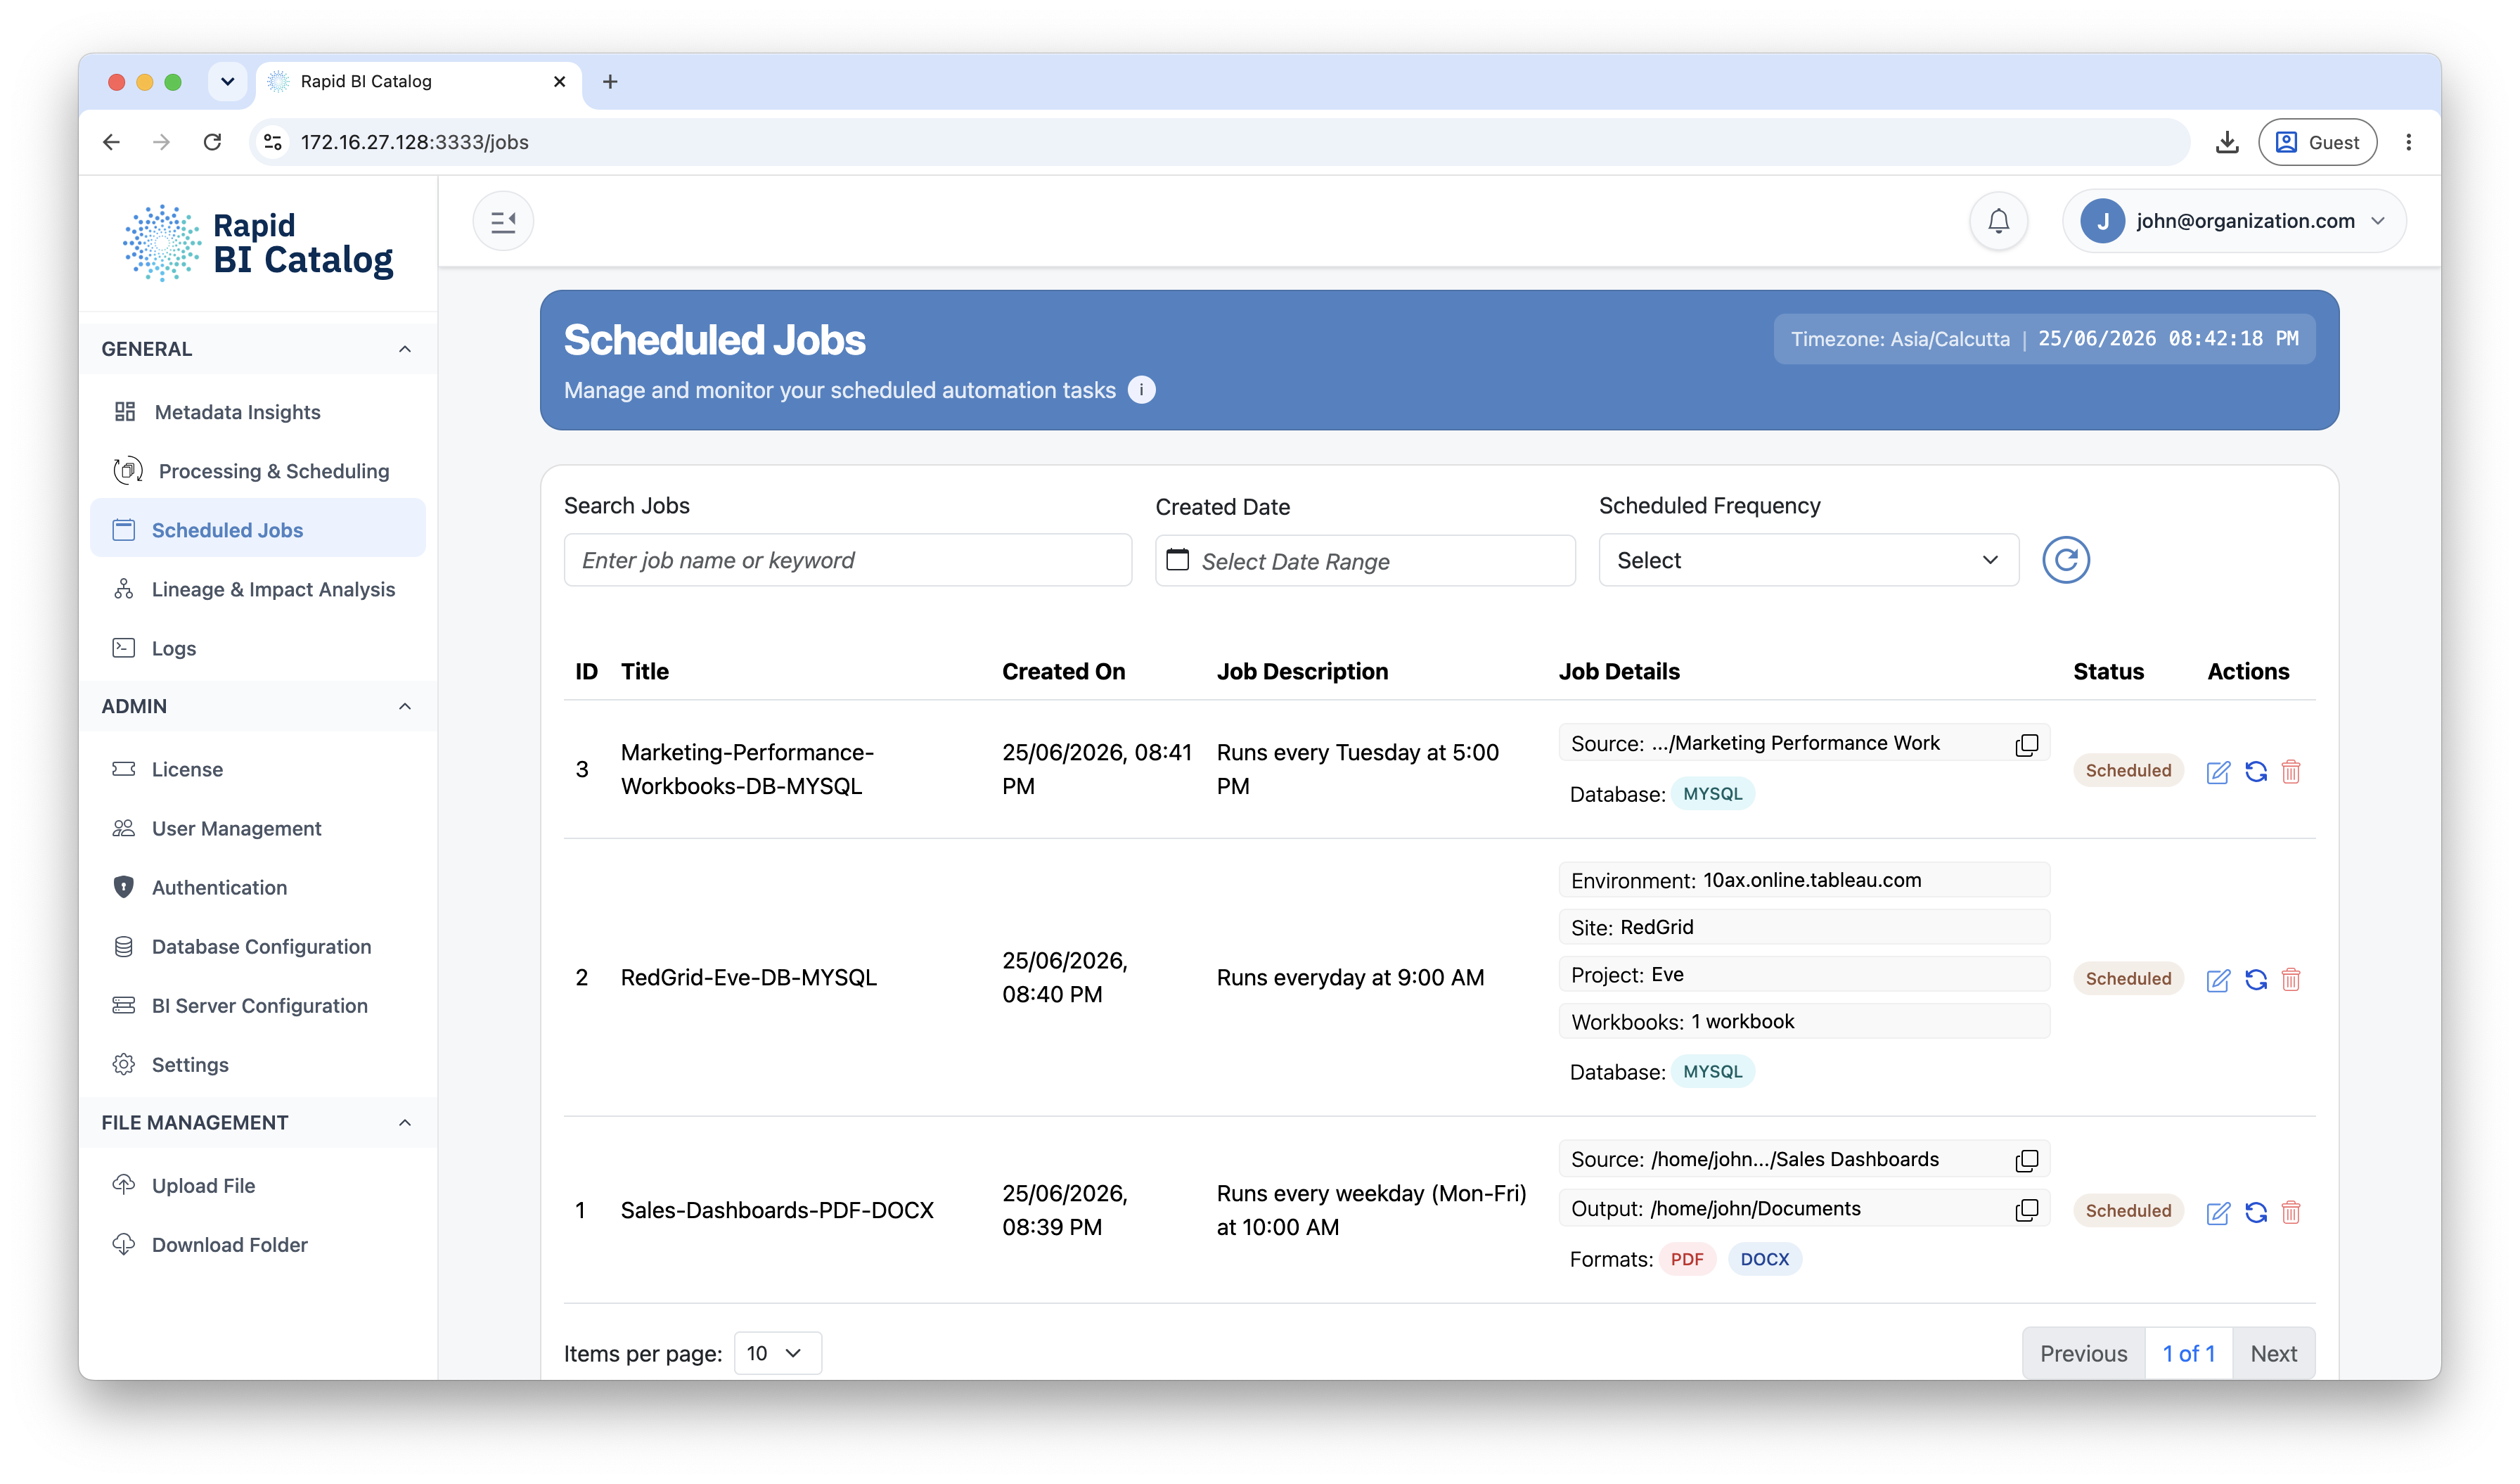
What You See on the Scheduled Jobs Page
- Job name and description (based on your selections)
- Next run time and recurrence
- Source scope (server folder, Tableau selection, or Power BI selection)
- Output type and destination
Creating a Scheduled Job
Scheduled jobs are created from the Processing & Scheduling page — not from the Scheduled Jobs page itself.
- Go to Processing & Scheduling.
- Configure your source, workbook selection, and output type.
- Enable the Schedule for later toggle.
- Enter a Job Title, set the Schedule Timing (date and time), and choose a Schedule Frequency.
- Click Execute to create the scheduled job.
How Scheduled Jobs Authenticate
Scheduled jobs run unattended, so they do not use your personal sign-in. Jobs that source from Tableau Server or Tableau Cloud authenticate with the site's Service Account — a dedicated Tableau token. A Service Account must therefore be configured for a site before you can schedule Tableau jobs against it. Jobs that process files already stored on the Rapid BI Catalog server do not require one.
Power BI jobs need no Service Account. A Power BI connection authenticates as a service principal rather than as a person, so a scheduled Power BI job uses the environment's own credentials. Configuring the environment in Power BI Service is all that is required.
Job Ownership & Control
Every scheduled job has an owner — the user who created it — and what you can do depends on your role:
- Power Users see and manage only their own jobs: create, edit, retry a failed run, and clear a job's error state.
- Administrators can view all jobs across users, reassign a job to another owner (see Transfer Scheduled Jobs), and remove any job.
Live Progress & Status
While a job runs, its progress and final result update automatically on the Scheduled Jobs and Logs pages — there is no need to reload. A manual Refresh control is also available if you want to update the view on demand.
Managing Existing Jobs
Search and Filter
Use search to locate jobs by name or scope (site/project/workbook or folder).
Edit a Job
- Click on the job you want to modify.
- Update the schedule parameters (timing, frequency) or inputs (source selection, output type).
- Save changes and confirm the next run time updates correctly.
Remove a Job
When a job is no longer needed, remove it to reduce noise and avoid unnecessary consumption of your usage quota.
Next Steps
- Create or run a job: Processing & Scheduling
- Set up the token jobs use: Service Accounts
- Transfer jobs between users: Transfer Scheduled Jobs
- Review execution history: Logs