Rapid BI Catalog connects to the Power BI Service to read reports and their semantic models, and to generate documentation, lineage and metadata from them. It authenticates with a Microsoft Entra app registration acting as a service principal. All Power BI configuration is performed by an Admin in the web UI under BI Server Configuration page.
How it works
- Environment — one Power BI tenant, identified by its Microsoft Entra tenant ID and the client ID of the app registration. Add one environment per tenant.
- Workspaces — you choose which of the workspaces the service principal can see should be catalogued.
- Authentication — the service principal signs in with a client secret.
- User discovery — Rapid BI Catalog reads each workspace's member list from Power BI Service, and offers each of your users the workspaces they are a member of.
Setup runs in five steps, in this order:
- Add the environment.
- Run Test Connection, which must pass before the environment can be saved.
- Choose the workspaces to catalogue.
- Run user discovery on those workspaces.
- Your users pick a workspace and start processing reports.
The grants this depends on — the app registration, the tenant setting, the workspace role and the Microsoft Graph permission — are listed with their reasons in Power BI Permissions. Get those in place first; every failure below traces back to one of them.
Step 1 — Add an environment
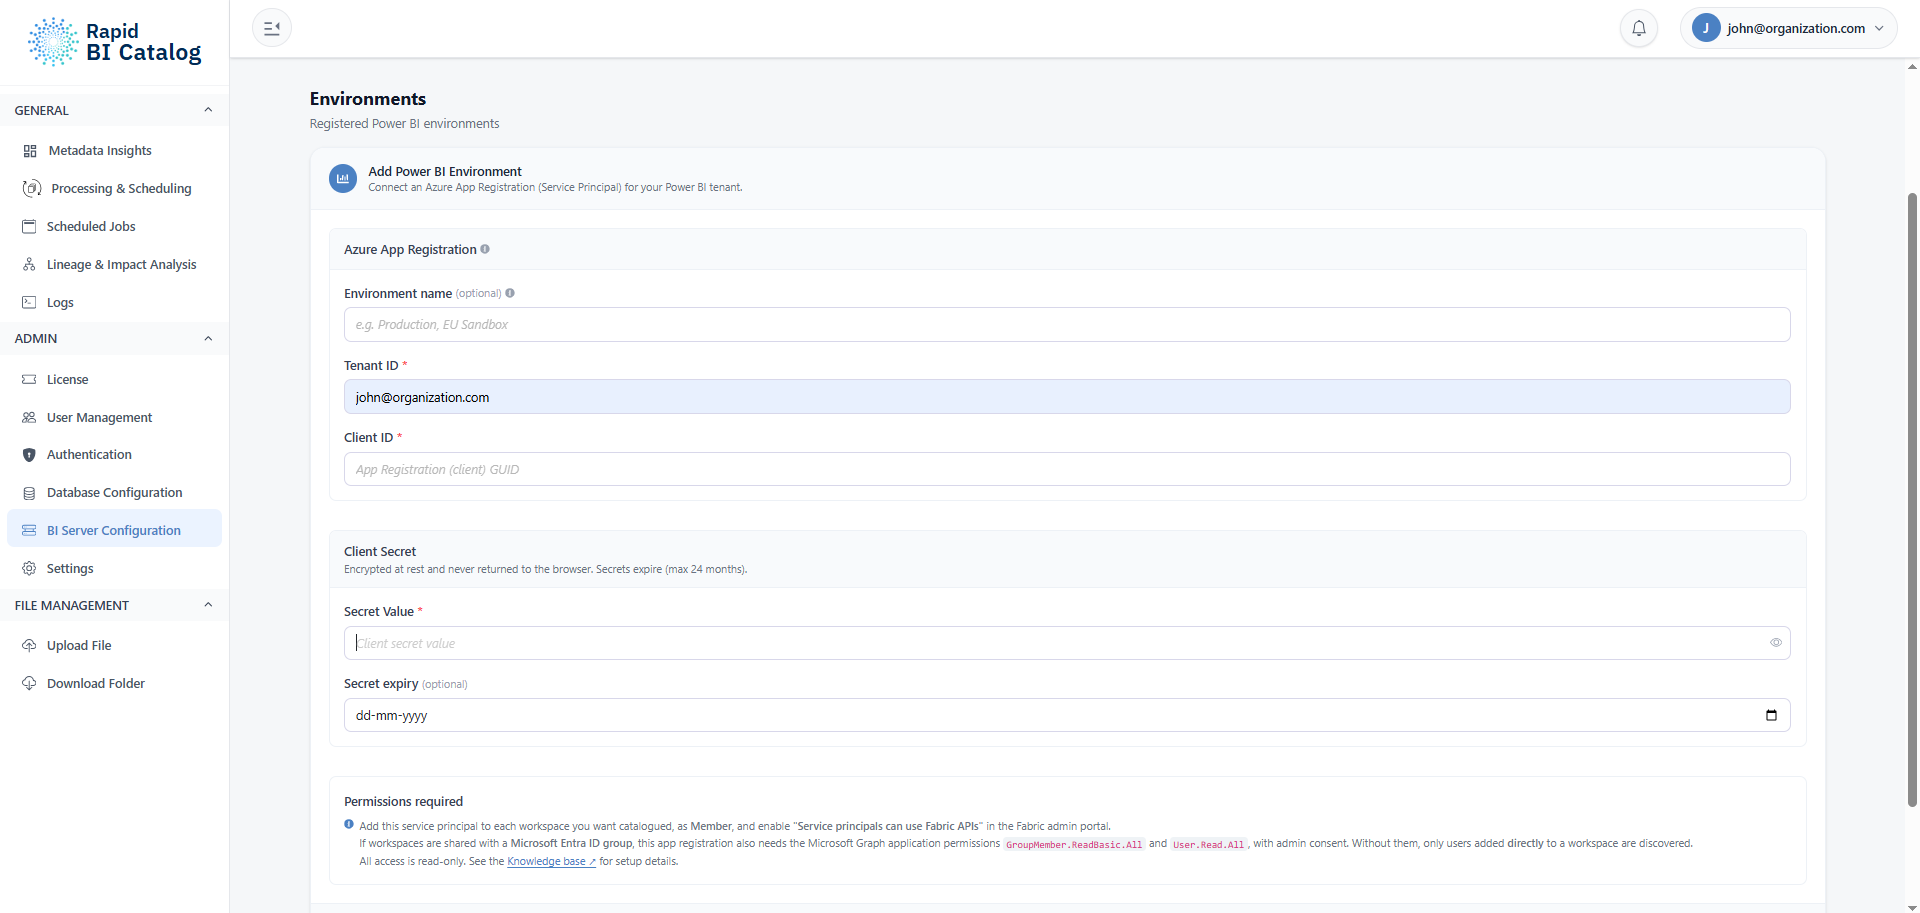
Open the BI Server Configuration page, select the Power BI tab, and add an environment:
| Field | What to enter |
|---|---|
| Environment name (optional) | A label of your choosing, for example Production or EU Sandbox |
| Tenant ID | The directory (tenant) GUID of the Microsoft Entra tenant your Power BI content lives in |
| Client ID | The app registration (client) GUID |
| Secret Value | The client secret value from the app registration |
| Secret expiry (optional) | The date the client secret expires |
The client secret
The secret is encrypted at rest and never returned to the browser. When you edit an existing environment the field shows a masked placeholder; leave it untouched to keep the stored secret, or type a new value to replace it.
Recording the expiry date is optional. Entering it is what earns the environment card a badge, so an expiring secret is visible before it takes the connection down:
| Expiry date | Badge on the environment card |
|---|---|
| Not entered | No badge is shown |
| More than 30 days away | Secret valid |
| Within 30 days | Expires in nd |
| In the past | Secret expired |
Step 2 — Test Connection
Test Connection acquires a token and lists the workspaces the service principal can see. It reports how many it found, and the environment cannot be saved until it passes.
Step 3 — Choose workspaces
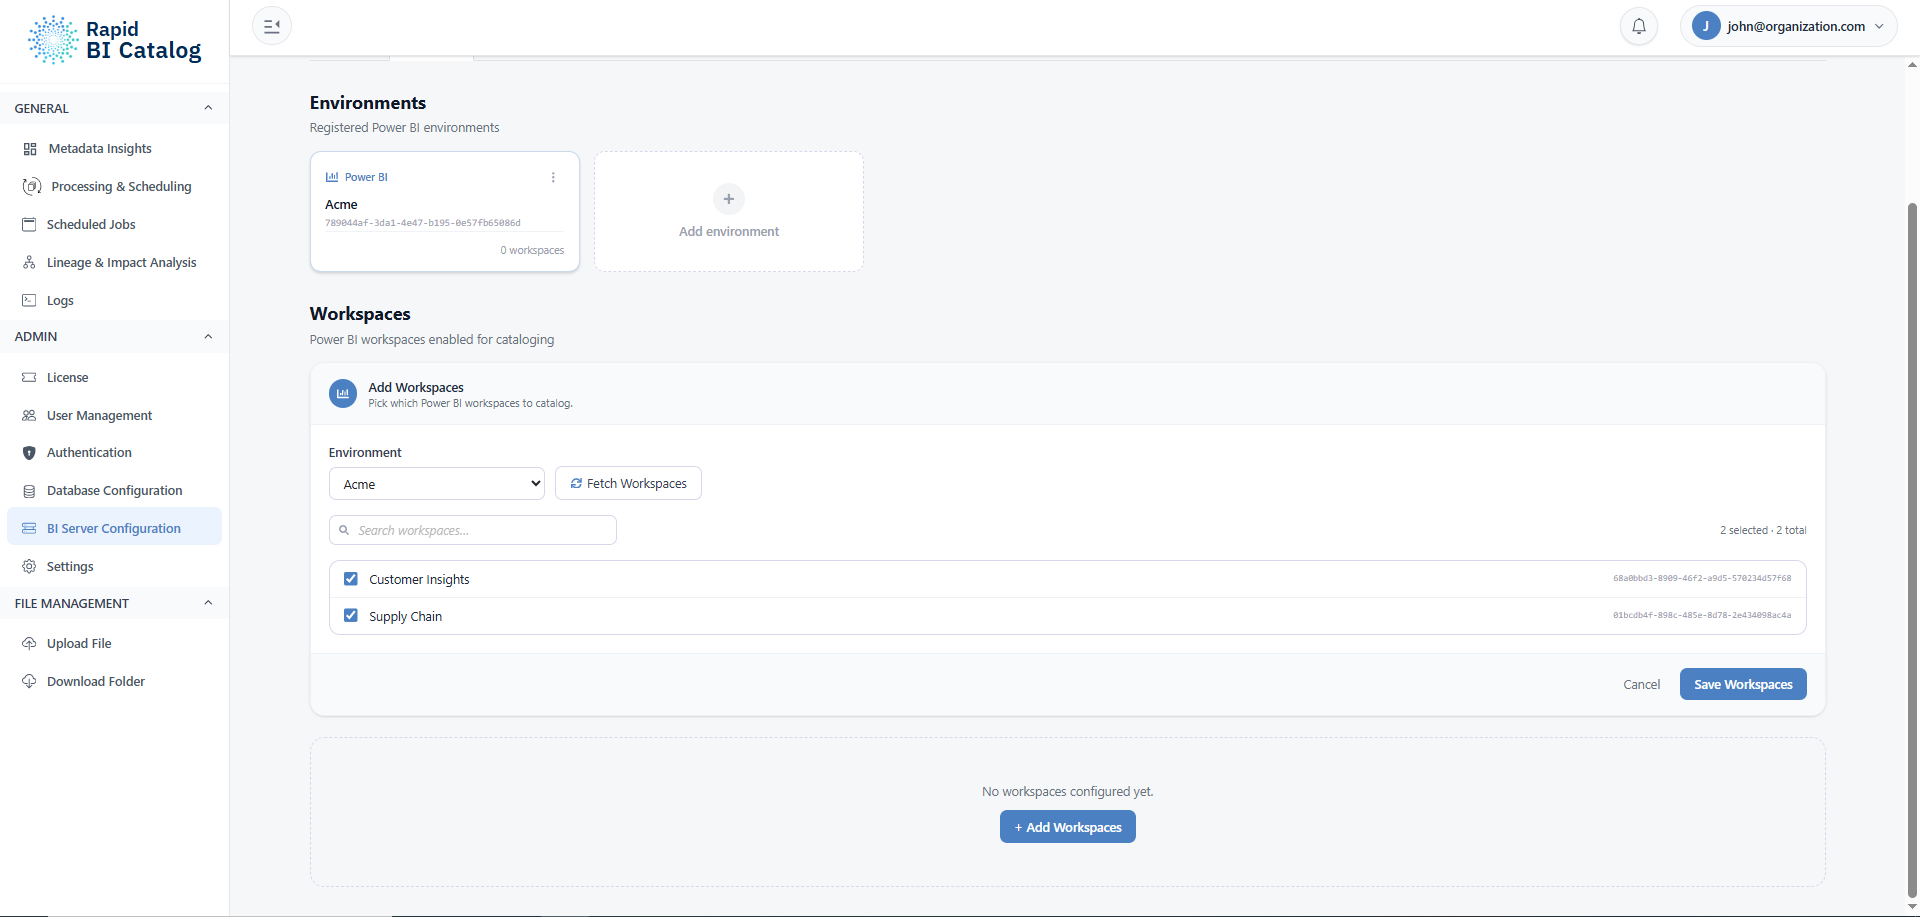
Next, pick which Power BI workspaces to catalogue. Fetch Workspaces lists what the service principal can see — a workspace it has not been added to does not appear at all — and Save Workspaces stores your selection. Only selected workspaces are catalogued and only they are offered to your users.
Step 4 — User discovery
Discovery reads the member list of each selected workspace from Power BI Service. Each of your users is then offered the workspaces whose member list their email appears in, so access follows what Power BI already holds.
The workspace table shows a discovery state for each workspace:
| State | What it means | What to do |
|---|---|---|
| Enabled · n member(s) | Members were read successfully and those users can select this workspace | Nothing |
| Discovery pending | The workspace has been saved but not yet discovered | Run Refresh discovery |
| No members discovered | The member list came back empty, or held only principals with no matchable email | Check the workspace role, and grant Microsoft Graph access if the workspace is shared with a security group |
| Discovery failed | The member list could not be read | Check the workspace role, then Refresh discovery |
Discovery re-runs automatically once a day, so membership changes made in Power BI are picked up without anyone doing anything. Use Refresh discovery when you do not want to wait for the next daily run.
How users are matched
The match is on email address: the email a user signs in to Rapid BI Catalog with must equal the sign-in address Power BI holds for them. A user account with no email address cannot be granted any Power BI access.
Troubleshooting
Errors an end user can hit when selecting a Power BI workspace, and what an admin does about each:
| What the user sees | Cause | Fix |
|---|---|---|
| No members have been discovered for this workspace | Discovery has not run, or returned nobody | Run Refresh discovery and resolve the state it reports |
| Their sign-in email is not among this workspace's discovered members | Discovery succeeded, but this user is not a member of that workspace in Power BI | Add them to the workspace in Power BI and refresh discovery, or confirm the two email addresses match |
Next Steps
- Grant what the connection needs: Power BI Permissions
- Add the environment in the admin UI: BI Server Configuration
- Process reports: Processing & Scheduling
- Open the required outbound hosts: Egress Allowlist